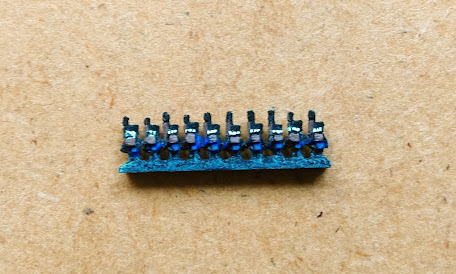
I love the Napoleonic era. Absolutely love it. So, a few years ago I invested in some 3mm Napoleonics and found a small scale that in my opinion looked good en masse and was easy to paint. Last year I painted about 1400 of these models - as they're in lines of 10, it's really not hard to do!
So how do I paint them? Firstly, it should be noted that batch painting these is the way forward. I do a minimum of six stands, but twelve is more usual - that's two units of 60 men each! I can get these done in about an hour.
I use these paints:
I'm going to point out that I should have made the blue a little brighter - but I'm a sucker for a more natural look. If I was doing this again, I'd definitely make them brighter, but I've painted over 800 of them now, so I'm too deep in!
I prime my models black. This gives a good base, although it does darken the overall colour, but if you miss a bit when paining, you can't easily tell. Remember, 3mm figures are going to look rudimentary at close range, but you should be going for the massed look from a distance.
Firstly, drybrush the models white, aiming mainly for the legs.
 |
| You get an idea here from my picture - I aim to drybrush the lower half of the model |
This also makes details stand out, but your main aim is to paint the white of the trousers quickly and easily!
Next paint the jackets blue. With a relatively fine brush, this is quick and easy.
 |
| As you can see, the blue is a bit dark |
Next up paint the muskets, wood of the banner pole and the backpacks. We're going to paint these the same colour, because at a few feet, no one will notice that they are the same.
I start with muskets - you only need one brush stroke, but be careful of the uniform. Minor mistakes can be ignored, but if necessary touch up at the end. Remember, the unit will be closely packed, so minor mistakes won't be noticed. After that, the backpacks - these are much easier and quicker to paint and for all twelve stands I estimate it should take about five minutes at most.
 |
| The backpacks are clearer here, but you can see the brown on the muskets too. The tips are left to paint silver, as they are the bayonets. |
Next white paint. You are aiming for the bedding on top of the backpacks, and the bandoliers on the front. There should, I believe, be two bandoliers but on these 3mm figures you can only see one. A fine brush, a steady hand and patience will get you through. Again, minor mistakes can be ignored.
 |
| You can see the bandoliers - a single stroke of paint gets these done |
Final steps - finish the flag with the red and blue. Le Tricolore should be proud and stand out - it's also a focal point for the unit. You can also use black to touch up the shakos or hats, which I like to do.
 |
| The finished front rank! Faces are my favourite part as it makes the unit come alive. |
 |
| A picture of the unit - 61 men strong, as I add an Eagle, a Colour or an officer, as I do love my French infantry |
I can get two units painted an evening, and then once I have a number of units painted I do all the bases at once.
In very little time, you can have quite a number of infantry units, ready to do battle. These are for Et Sans Résultat, so each of the units is a Line Infantry Battalion. Once you get a number of them, they start to look quite impressive. As you can see, the men are fairly indistinguishable, but the flags are not - this helps identify the units and nationalities much easier.
 |
| Vive la France, vive l'Empereur! |
I do hope this is, and has been, useful if you make the 3mm plunge!


No comments:
Post a Comment